Please scroll down to look for the information you require:
1. Choosing an engine to upload the rule
2. How to Upload a Basic Runtime Rule
3. JavaScript Rules
4. How to Create a JavaScript
5. How to Save & Upload a JavaScript Rule
To access the Runtime Rules screen, access Menu>Translation>Runtime Rules
To see how to create a runtime rule please read this link, https://languagestudio.freshdesk.com/solution/articles/12000014442-what-is-and-how-to-create-a-basic-runtime-rule
1. Choosing the engine and project
The screen is split into 3 sections, Language Pair and Domain and the rules tabs, Basic Rules and Javascript Rules.
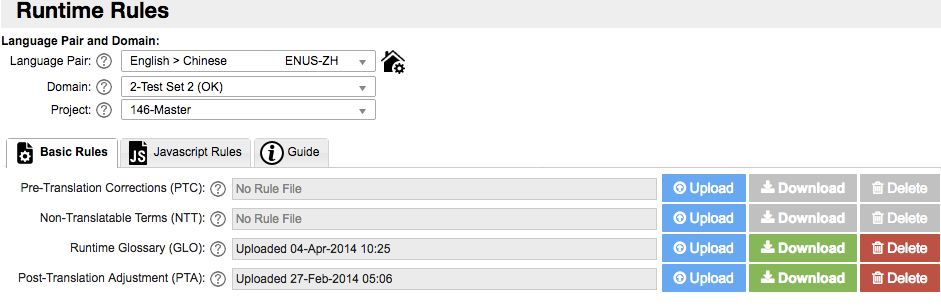
Language Pair Set and Domain:
Before you can apply any rules you need to choose the
appropriate engine and project.Select, the Language Pair and choose either your Custom Engine (engines specific to your account) or Industry Engines (engines not specific to you account that have not been customized).
Choosing the Engine
Press the Language Pair drop down and choose either Custom Engines or Industry Engines tab. For this example, we will look at selecting an Industry engine. First, select the source you are after.

After you have selected the source, then the relevant targets will appear. Then, select the target you want for the engine.

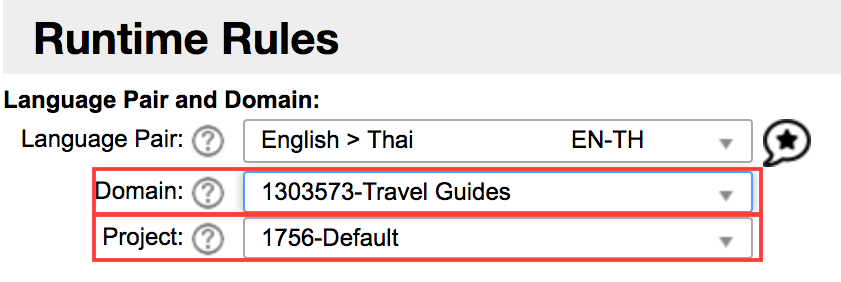
Afterwards, choose the engine that you want from the Domain field and the relevant Project.
2. How to upload a rule a Basic Runtime rule
Pre-Processing Rules & Post-Processing Rules
Once, the Language Pair Set and Domain has been set, then you can upload the rule. If uploading a basic runtime rule, please make sure Basic tab is selected. For JavaScript rules, please see further down the page.
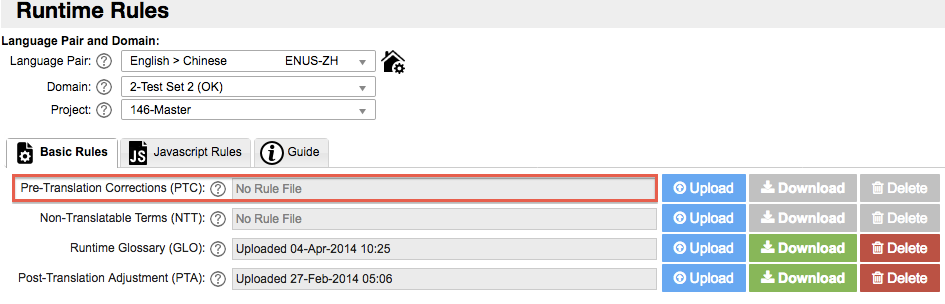
There are 3 types of Pre-Processing rules, PTC, GLO and NTT.
Firstly, scroll down to the relevant rule and select Upload. For this example, we will choose a PTC.
Once the pop-up opens, to find the rule you wish to upload, click +Add files to select the rule you wish to upload.

The rule will appear ready for Upload. Remember to name the rules appropriately (a GLO will be named ****.glo, NOT .txt),. For example, default.1303333.pta, otherwise there will be an error that the file is the wrong format. Use the wording format, <default>,<DC number>

Once uploaded, the rule will appear. From now on, any translations on that engine for this particular project will have this rule applied.

You can also choose to download or delete any rules.
Now that these rules are uploaded to the particular area, these rules will be chosen at runtime while translating.
3. JavaScript Rules
There are 25 steps to processing a translation. Each step
performs a specific function in preparing data for translation or in
reformatting and adjusting text before and after translation. In between each
major function is a custom JavaScript step that can be executed to perform
custom functionality to meet your specific requirements that are normally
outside the scope of standard pre and post processing.
These JavaScript rules can be added to the runtime rules as shown in the last segment. JavaScript pre and post processing is specific to a custom engine sub-domain and a project. Each custom engine has a unique Domain Code. This is displayed in Language Studio™ Enterprise when you are viewing the sub-domain properties.
Scripts are applied at a project level. To apply a default script that will be loaded automatically each time a job is executed, upload the file into the project folder. When a job is submitted for processing in the project folder and using the domain code specified, it will automatically be applied to the job.
There are 12 JavaScripts that are executed during the workflow process and can be amended and adjusted to meet any of your requirements.
Here is an example of some of the main JavaScript rules and what they do:
Pre-process JavaScript 1 (JS1) - Custom script for modifying a document before it is loaded for processing.
This is useful for changing the document ahead of any processing. Examples include executing OCR, changing fonts or adjusting the document to address issues in the document that have a negative impact on the translation.
Pre-process JavaScript 2 (JS2) - Custom script for modifying the source before being processing.
This is useful to manipulate documents ahead of processing, but once the document has already been loaded into memory. This is usually only useful for text, XML or HTML documents. Examples include blocking sections of the document so that it is will not be translated.
Pre-process JavaScript 3 (JS3)
At this stage, all the text that is to be translated has been extracted as sentences. The data has 1 sentence per line.
Post-process JavaScript 10 (JS10)
At this stage you can modify the output for specific final formatting and apply rules that are too complex for a PTA.
Post-process JavaScript 11 (JS11)
This is the last stage before the text is merged back into the original document format.
Post-process JavaScript 12 (JS12)
This stage provides an opportunity to modify the final file. This could be useful for changing fonts, inserting additional information or reformatting the content.
When these rules can be applied:
These rules can be applied when it is beyond the ability of a simple runtime rule and specific changes are needed.
An example of the needs for amended JavaScript rules for our clients have been for the following instances:
- Changing date formats.
- Recognizing individual characters and groups of characters that need to appear in a certain place in the output.
- For dealing with Product codes, such as EX1085.e
- For measurement units, currency convertors and temperature convertors.
- For complex capitalization rules.
Knowing which JavaScript rules to apply and how to create them can be discussed with your Technical Account Manager.
3. How to create a JavaScript Rule
A template on how to create a JavaScript rule can be found here, https://languagestudio.freshdesk.com/support/solutions/articles/5000635842.
4. How to upload to Language Studio
Each JavaScript step has a separate file name that is made up as follows:
default.<domain
code>.js<step>
So, for Domain Code 1301518 and step 5, the file name would be default.1301518.js5
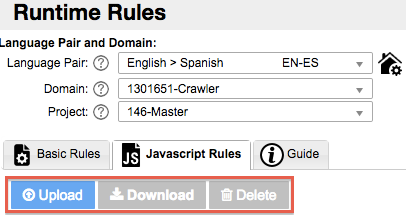
To load the script, select the appropriate engine and project. Then choose the JavaScript Rules tab

Select Upload.
Then choose the JavaScript rule(s) you wish to upload.

Press Start Upload to upload the relevant JavaScript.

The JavaScript rules will upload to the appropriate slot depending on the naming of the file.

Now, for any jobs that are translated through this custom engine and project, these
translations will go through these JavaScript steps and pick up the rules.