How to Translate with Custom or Industry Engines in LS4
Please scroll down or click on one of these links to look for the information you require:
1. Basic and Advanced Translating Options
2. Custom and Industry Engines
3. Picking a Custom Engine
4. Picking an Industry Engine
5. Translating Text or a Document
6. Submitting the Translation
7. Downloading the Translation
Accessing Translate Screen
Access Translate screen by clicking Menu>Translation>Translate
1. Translation Modes – Basic and Advanced
In the top-right of the screen, there are 2 modes available when translating in Language Studio Enterprise web portal:

Translation Modes:
1. Basic: All the most common settings are pre-configured and the advanced settings are hidden.
2. Advanced: All advanced settings are visible under the Advanced Settings tab giving more control over the job options and results; with the added ability to choose which version of the engine to translate with.
Basic Translation Mode
We will look at the default and most common way of translating first, which is in Basic mode.

2. Custom and Industry Engines
There are two choices of
MT engines to translate with. Your own Custom Engines specific to the domains
that you have built with domain specific data. Whereas Industry Engines are Language Studios (off the shelf) engines that have not been customized. The page defaults
to Custom Engines as shown here and below you will find a more detailed
description of the differences. These engines are available to paid up clients who have engines already created in their account.
All Industry Engines* are available for translation through the Language Studio Cloud portal. For accessing engines through a TMS system or through API, all your Custom Engines** that have been published will automatically be set up for API access. However, to access our Industry Engines by API, the specific engines you wish to use need to be set up on your user's account in Language Studio. Please see this article for how to set this up - https://languagestudio.freshdesk.com/solution/articles/12000019678-how-to-access-industry-engines-through-api-permissions-in-language-studio
Please also see the footnote explaining what an Industry and Custom Engine is.

Custom Engines
Custom Engines are the engines that have been customized on your account and have been built with your own domain specific data. These can be built and amended over time to become very powerful engines rich in specific domain data, with different versions of the engine available for translation.
Industry Engines
Industry engines are a new feature in Language Studio 4 which enables you to translate documents and text through off the shelf engines that have not been customized.
The benefits are that you have engines available for translation outside of your customized language pairs, which is useful when you have projects for engines that you haven’t yet built for clients or if you are considering in seeing what other potential options are available for future customized engines that you wish to try out first.
Do remember that these engines have not been customized, so the output may not be suitable in some cases for your needs.
Some important points regarding the use of Industry Engines:
- These engines are for translation only and can not have data uploaded to, unlike a customized engine.
- Runtime Rules can be applied to these engines, such as glossaries and non-translatable terms.
- These engines are available when translating through a TMS, such as MemoQ, XTM, SDL Trados etc.
- These engines are available for all Language Studip clients, so no modifications to the engines can be applied. For example, extra data being applied, modifications to rules specific for individual customers etc.
- There is limited support for these engines in regards to translation output and must be raised by email to your Technical Account Manager - not through our Support helpdesk - who will decide if further investigation is necessary.
3. Picking a Custom Engine
Language Pair (mandatory)
Choose the Language pair for what you want to translate from and to. Click on the drop down menu for your list of Custom Engines.

Once selected, the Language Pair field will be filled.

If you hover the mouse over the icon to the right of the language pair, confirmation these are Custom Engines will show.

4. Picking an Industry Engine
If you wish to translate with an Industry Engine, click the Industry Engines tab, instead. Select your Source Language, which will then list all the Target Languages for this language pair. You can choose whether to show language variants or not by clicking on Show Language Variant.

Once the Target Language is selected, the Language Pair will be selected in the Basic Translation tab and notice this time, the Industry label will show to the right of the language pair.

Domain (mandatory)
Select the relevant engine you wish to translate with from the drop down list.

Project (mandatory)
Choose the relevant project. If unsure, use your default project or speak to your MT Project Manager on which project to use.

Batch (optional)
Can be used to name a batch of files you are translating, if wanting to separate from other jobs. You can add your own naming to the batch or alternatively, press the timestamp button to use a timestamp for the batch of translations.

Options – Produce Translation Log File: This can be switched on for debugging purposes and is often used by our technical support for analyzing translation output.
5. Translation
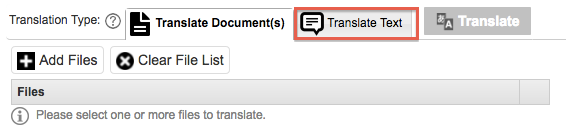
Translation Text
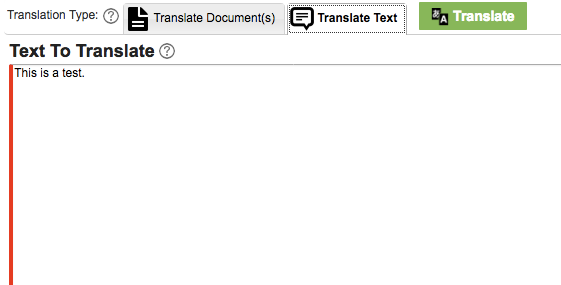
Once the Translate Test tab is clicked a field will appear to type in the text you wish to translate. This is useful for small amounts of text that you wish to translate or for testing purposes.

Type in the text you wish to translate and then click Translate.
Translate Document
To upload a file select he Translate Document(s) tab (default), and press Add Files.
A couple of important points, make sure the source files are in UTF-8 formatted text and if the file is bigger than 10MB, look at translating through a TMS system, such as memoQ into Language Studio. Furthermore, the first translation on a particular engine will take longer than subsequent jobs on the engine, as the engine gets uploaded first time to an available slot on the translation servers.

Once selected, the Add Files To Project screen will appear. The default tab is to Upload Files. If you wish to add files to translate, select Add files.

Select the file(s) you wish to upload.

When finished, click Save to upload the file(s).

Selecting File from Translation Project.
Another option is to translate a file/s that is stored in your translation project. Select the tab Select Files From Translation Project after selecting Add Files.
Once selected, all the files that are stored in this project will appear. Select the file(s) you wish to translate, then click Save.

Files From Pickup / Drop Off Folder
The last tab available for when translating, is to translate files that are stored in the the Pickup / Drop Off Folder. Select the tab, Select Files From Pickup / Drop Off Folder after selecting Add Files.

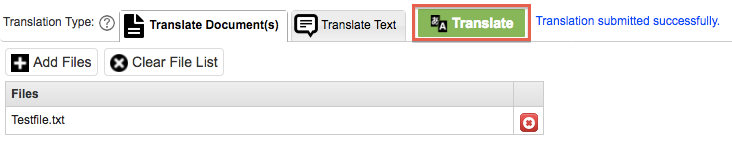
Once selected, select the file(s) you wish to translate, click Save and then click the Translate button (as shown below)
Advanced Translation Mode
Selecting the Advanced option, adds another tab to the Translate screen and also an engine Version translation option.
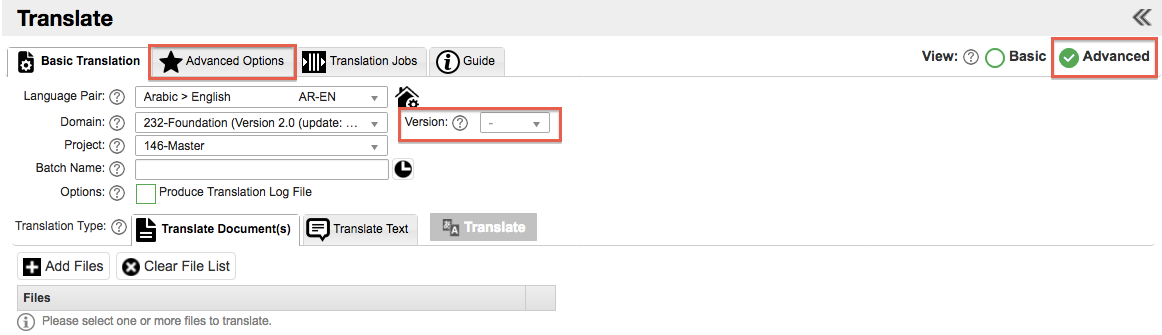
The Version option gives you the choice of whether you wish to translate the current version of the live engine or a previous version.

Why would you want to choose a different version? It might be possible that you wish to test a translation on a previous version of the engine or that you believe the previous version is closer in context to the output you are looking for rather than the current version.
Click the Advance Options tab to set some options to the way the file is translated.

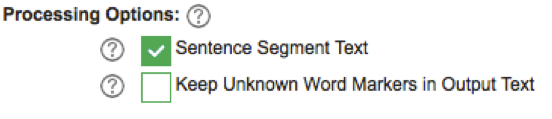
Processing Options:
Sentence Segment Texts when enabled (default) will sentence segment text with language specific statistical and rule base sentence segmentation technology.
Keep Unknown Word Markers in Output Text, when enabled will insert and XML marker when an unknown word is encountered.
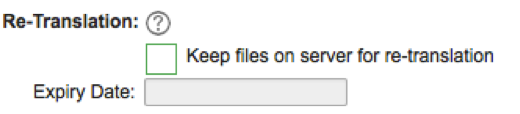
Re-Translation
This is a useful option to select if you wish to translate these files again for free of charge.
Enable, if you wish to Keep files on server for re-translation. Add Expiry Date, for how long you wish this file to stay available for re-translation.
Output Options
The Folder is for storing translated outputs into a sub folder under the relevant project.
Extension, is for when you have a file to translate, it will add an extension to the original file name so that it is easy to identify and match to the source file.

Open Standard Exchange Files
Enable these if you also want the translated file in a TMX and\or XLIFF format.
When finished setting up the Advanced options, switch back to the Basic Translation tab and select Translate.

6. Submitting the Translation
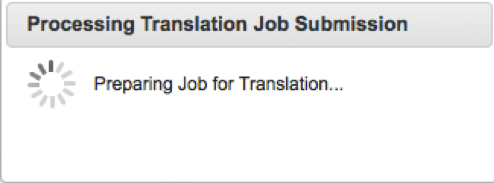
To submit the file/s for translation, click the Translate button, you will be notified by a pop-up screen to say the job has been sent for submission.
You will be able to see the progress in the Translation Jobs tab. The top part of the screen gives you details of the engine, the job type, the project, the input file and the output file.
The Job ID is a useful field, as each translation job has its own specific ID.

The progress bars tell you which part of the translation step the job is at (there are 27 steps in all) and the elapsed time of the translation and speed (words per minute).

When finished your screen will show completion of the job.

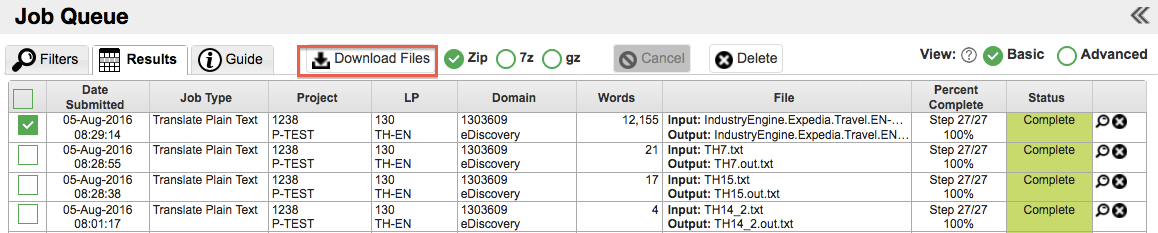
7. Downloading Translated Output
Download the output by clicking Download and the file options you wish to download.

An alternative, is to go
to the Job History page to find your
job in the Job Queue and download the file from there (you can access the Job Queue by selecting Menu>General>Job History and then select the Results tab.
If there is an issue with the download or there are errors, please contact support@omniscien.com